If you’re ready to improve your game, getting into disc golf basket drawing is a great way to start. It’s all about practicing your throws and developing your distance control. With every toss, you'll get a better feel for how to approach the basket. Plus, it’s just plain fun! You don’t need a fancy setup, just find a park or open space where you can set your basket up and go for it.
One approach is to find a good spot to set up your basket. Make sure it's on a level surface, away from distractions. You want to focus on your throws without worrying about obstacles. Take a few moments to view the area and think about different angles and distances. This will help create a solid foundation for your practice.
Next, grab a few discs: a putter, a mid-range, and maybe a driver if you have more experience. Starting with a putter is ideal since it will help you refine your short-distance throws. When you’re practicing, visualize your disc golf basket drawing skills by imagining the basket in your mind. Aim to throw directly at your target, focusing on your grip and release.
Keep it interesting! Change up your throwing angles and distances. This keeps your practice sessions from feeling repetitive and allows you to work on different techniques. As you improve, try to challenge yourself with trick shots or longer throws. The best part? You’ll not only refine your skills but also discover what works best for you along the way. Happy drawing!
Essential Tools for Your Drawing Journey
When you’re ready to dive into disc golf basket drawing, having the right tools can make all the difference. Here’s a quick rundown of what you need to elevate your game and capture those awesome designs.
First up, a solid sketchbook is essential. Look for something with thick, quality paper that can handle pencil, ink, and even some coloring if you feel adventurous. This lets you experiment without worrying about the pages ripping or bleeding through.
Next, grab a set of drawing pencils. A mix of HB, 2B, and 4B pencils will give you the versatility to create everything from light sketches to deep shadows. You’ll love how easy it is to adjust your lines as you refine your disc golf basket drawing.
Don’t forget about fine liners or ink pens! A good set can make your final artwork pop. Look for pens with various nib sizes, so you can add intricate details and bold lines. This is where your unique style really shines through.
Lastly, consider adding some colored pencils or markers to your toolkit. Whether you go for vibrant markers or a more subtle colored pencil set, adding some color can make your disc golf basket drawing stand out and look complete. Have fun with it and let your creativity flow!
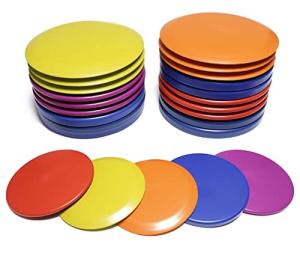
GOOSO Disc Golf Starter Set 24 Pack - DIY
Build Your Disc Golf Game with the GOOSO Disc Golf Starter Set 24 Pack DIY Kit
Product information
$59.99
Product Review Score
4.79 out of 5 stars
130 reviewsProduct links
Step by Step Drawing Techniques
Getting the hang of disc golf basket drawing is a fun way to tap into your creativity while showing off your love for the game. Let’s break it down step by step to make it easy and enjoyable.
First, grab a pencil and some paper. Start by sketching a simple circle for the top part of the basket. This will be the rim where the discs will land. Don’t worry about perfection—just get that circle down!
Next, below the circle, draw a straight line down for the pole. This is where the entire basket will hang. Make it a bit longer to give it a sturdy look. You want your disc golf basket drawing to feel solid, right?
Now, it’s time to add those essential basket elements. About halfway down the pole, draw a wider circle to create the base of the basket. Then, sketch several vertical lines from the base up to the rim. These lines will represent the chains that catch the discs. You can add some curves to these lines for a more dynamic feel.
To finish off your disc golf basket drawing, think about adding details. You might want to shade in the basket for depth or draw some grass around the bottom to ground it. Even adding a few discs flying toward the basket can make your drawing pop! Have fun and let your personality shine through your sketches!

Discraft Brodie Smith CryZtal FLX Zone Mini Disc
Elevate your disc golf game with the CryZtal FLX Zone Mini Disc from Discraft Brodie Smith
Product information
Product Review Score
4.55 out of 5 stars
177 reviewsProduct links
Tips for Improving Your Skills
Improving your skills in disc golf basket drawing can really take your game to the next level. Here are some handy tips to help you enhance your technique and accuracy.
First off, practice makes perfect. Spend some time each week just focusing on your disc golf basket drawing technique. Head to your local disc golf course or a nearby park where you can set up a target. The more you practice, the more comfortable you'll get with different angles and distances.
Next, pay attention to your grip and stance. Hold the disc firmly but not too tight, and find a comfortable stance that feels balanced. Make sure your feet are shoulder-width apart, and aim to shift your weight smoothly through your throw. This position will help with accuracy and distance.
Also, consider watching some tutorials or videos. YouTube is full of great content where you can see how the pros do it. Seeing different techniques in action can spark new ideas for your own disc golf basket drawing. Plus, you can pick up useful tips that you might not have thought of on your own.
Finally, don't forget to have fun! Keep it light and enjoy the process of improving. Try setting small goals for your disc golf basket drawing and celebrate your progress. The more you enjoy it, the more motivated you'll be to practice and get better.